Thursday, April 28, 2011

How to Repair a Tub-and-Shower Valve

Instructions

Things You'll Need:

  • Adjustable Or Channeltype Wrench
  • Screwdriver(s)
  • Rag
  • Locking Pliers
  • Cartridge Repair Kit
  • Old Toothbrush
  • Nail File Or Other Pointed Tool
  • Allen (hex) Wrench
  1. Access the valve

    • 1
      Pop off the valve cap with the point of a nail file or a similar tool to expose the handle screw. Remove the screw and pull off the handle.
    • 2
      To remove a lever handle, look for a setscrew (a small cap may conceal it as well) and loosen it (it may have a hex or a slotted head).
    • 3
      Remove the escutcheon (cover plate). Depending on the model, you may need to remove other parts between the handle and the valve body. Lay out the parts in order of removal or label them so you can replace them the same way.
    • 4
      If the valve has stop-check valves--large plugs with slotted heads in T-fittings on the hot and cold feeds that lead to the valve-- close these by turning them clockwise. If the valve does not have shutoffs or if they're inaccessible, shut off the hot and cold water to this branch or to the entire house if necessary.

    Remove, repair or replace cartridge parts

    • 5
      Pull off the U-shaped retainer clip (see illustration). Or use an adjustable or channel-type wrench to remove the nut that locks the cartridge into the valve body.
    • 6
      Grasp the cartridge with locking pliers or a similar tool and pull it straight out (see illustration).
    • 7
      Open a water line momentarily to flush out any dirt in the valve body that might cause a leak. Stuff a dry rag under and around the valve to keep water out of the wall opening.
    • 8
      Clean the cartridge with an old, soft toothbrush and replace the O-ring at the base of the stem. Reinstall to test.
    • 9
      If the problem persists, purchase a cartridge repair kit, which will include the cartridge, a full set of O-rings and grease. Install it according to the manufacturer's instructions.
Click here to find out more!

Tuesday, April 26, 2011

Tankless Water Heaters - Hot Water on Demand

When a homeowner decides to replace his current water heater, there are several options to consider. The two main options for water warmers are tank and tankless water heaters. Most houses have tank water heaters, which take water into an insulated tank and heat it until the water is sent to various locations within the house. However, these traditional water heaters take up a lot of physical space and routinely run out of heated water, especially with large households. In comparison, tankless water heaters more efficiently use energy, space and money.
A tankless water heater heats the water as it flows through a heat exchanger coil. And unlike traditional hot water heaters, tankless water heaters do not retain any water except for what is in the heat exchanger coil. The other charm of a tankless water heater is that it produces hot water on demand. No longer does the user have to wait for a storage tank to fill in order to receive endless hot water.
Most tankless water heaters provide hot water at a rate of two to five gallons per minute; gas fired tankless water heaters produce higher flow rates than electric tankless water heaters. Because they take up little space, some households opt to install two or more tankless water heaters. This allows a house to have specific water heaters for hot water hogs such as washing machines, dishwashers and pools. When deciding which water heater to purchase, consider where you need hot water. Decide whether you need the water throughout the entire house, in one room or at one appliance. Determine the number and type of fixture that will need a hot water heater because each fixture requires different amounts of hot water.
Before purchasing a tankless water heater – Stiebel Eltron, Rheem and Takagi are major manufacturers - decide whether you would like an electric or gas fired tankless water heater. With an electric tankless water heater, an electric element heats the water as it enters the unit through a pipe. If you plan to purchase an electric tankless water heater, you will have to understand how much voltage and amperage your house can accommodate. You should take into account how the hot water heater will affect the circuits in your house because it may be necessary to put your electric tankless water heater on its own circuit. Before installing an electric water heater, consult a licensed electrician for more information.
With gas-fired tankless water heaters, a gas burner heats water as it enters the unit. If you plan to purchase a gas-fired tankless water heater, you will have to understand the different types of fuel that fills the tankless water heaters. Users should examine their current gas line to ensure that it can accommodate the requirements of your new gas-fired tankless water heater. Next, you will need to consider venting requirements for your water heater. Also, be sure to check local building code to ensure compliance of regulations.
This is a natural shift from old technology to new. Traditional hot water heaters will remain in use for a short while as more homes transition into the more efficient, space-saving tankless models.

Monday, April 25, 2011

History of Plumbing in America

They were the master farmers of America's Southwest, and engineers of great networks of irrigation canals in the Salt River Valley. They first appeared about 350 B.C., building canals of open ditches, gouged out with stone tools and wooden hoes. The canals spanned almost 250 miles, stimulating trade and commerce between communities of hundreds and thousands of people. No one knows why, whether by climatic upheaval, drought or floods, the Hohokams suddenly vanished in 1450 A.D., well before Columbus discovered America or the Pilgrims landed at Plymouth Rock.


Left: American water pipes originally
were made from bored-out logs like this artifact.

The Pueblo Grande ruins of this lost culture sit in ironic view of the jet planes taking off at the Phoenix airport. Located on East Washington Street, they provide a specter of dry bank canals 80 feet wide and 20 feet deep. Strange trash mounds offer clues of organic wastes, vegetation and shells. And multi-storied "apartment" buildings attest to a condo style of life. But there is no evidence of any piping, latrines or privies. Native Americans, it is explained, have always shunned communal spots for defecation.
New World settlers would copy the Indians casual discharge of waste and refuse in running water, open fields, shrubs or forests. Like their folks back home in Europe, the colonials would also toss garbage and excrement out the front door and windows onto the streets below. The country's first garbage disposers would be hogs and scavengers.
It would be more than midway through the 19th century before young America would develop reasonably efficient water and sewage systems, and for the great invention of the water closet to make an appearance. But our forefathers made up nicely for lost time.
Thanks to the plumbing industry, the United States would set standards in health and safety unsurpassed m the world today. At the forefront was the unsung plumber, the skilled craftsman of lead, expert bell hanger, blacksmith, tool maker, tin and sheet-iron worker.

Closet Lore: Over 2,800 years ago, the fabled King Minos of Crete owned the world's first flushing water closet, complete with a wooden seat. Lost for centuries in the rubble of the palace ruins, the invention did not materialize again until 1594. Then, Sir John Harington built a "prive in perfection" for his godmother, Queen Elizabeth, to use in Richmond Palace, and one for himself at his humbler estate. Once he published his pompous book of terrible puns and off color jokes about the new device in 1596, A New Discourse of a State Subject, Called the Metamorphosis of Ajax, the ridicule and scorn would hound him for the rest of his days, and he never built another one. ("Ajax" was the slang in those days for a privy or "a jakes.") To the world's misfortune, another 200 years would pass before the idea took hold again.
Thus, when the colonists packed for the New World, they probably tucked a chamber pot in among other crockery items and tinware. But to a backwoodsman or a bride of 14, the term "chaise percee" or "commode" often disguised its use. In the early 1800s, a settler's wife reportedly bought several from the new stock at the local store for kitchen and table use.
The privy or outhouse slowly became accepted, albeit a peril for those walking by. One diarist disgustedly wrote: 'Privy houses set against ye Strete which spoiling people's apparill should they happen to be nare when ye filth comes out ... Especially in ye Night when people cannot see to shun them."
From the more humble and ramshackle outhouses of wood emanated more glorious structures. Human nature as it is, some became symbols of distinction as would current bathrooms of the well-to-do. William Byrd’s 1730 outhouse was made of brick and had five holes. Byrd was chef magistrate of the colonial court and thus sat on the largest seat at the center of a raised, semicircular bench. So did Mr. Byrd preside in the family privy.
Dozens of years later a two-story model was built and still stands in Crested Butte, Colo. The upper level was used when heavy snow blocked the first floor. A more typical, single-hole outhouse is found in a replica located in Old Sturbridge, Mass.
How to bring a workable water closet into the house without mess or odor was an invention waiting to be born, however. Some of the country's leading citizens would try to improvise on the basic knowledge of the times.
Thomas Jefferson, for example, devised an indoor privy at his Monticello home by rigging up a system of pulleys. Servants used the device to haul away chamber pots in his earth closet (a wooden box enclosing a pan of wood ashes below, and a seat with a hole cut out at the top). An architect and inventor as well as statesman, Jefferson also built two octagonal outhouses at his retreat at Poplar Forest in Virginia.
In the early 1840s, the architect and designers of New York City's Central Park denounced the outhouse as 'troublesome, unhealthy, indelicate, and ugly." It was all true. They tried to correct this by designing little Gothic structures combining a summer-house with a view of the garden on one side, and a two-holer on the other. Outside of a few private homes, hotels were the bastions of luxury and comfort - and indoor plumbing. In 1829, the brilliant young architect, 26-year-old Isaiah Rogers, sent ripples of awe throughout the country with his innovative Tremont Hotel in Boston. It was the first hotel to have indoor plumbing and became the prototype of a modern, first - class American hotel.
The four-story structure boasted eight water closets on the ground floor, located at the rear of the central court. The court was connected by glazed corridors to the bedroom wings, dining room and rotunda.
The bathrooms in the basement were fitted with cold running water which also went to the kitchen and laundry. The bathtubs were copper or tin and probably had a little side-arm gas furnace attached at one end. Perhaps shaped like a shoe as the French and English models, the water in the tub would flow and circulate backwards until the entire bath was heated to satisfaction.
Since the 1790s, the Northeast had bath houses, but not until this period several decades later would city hotels or new dwellings have baths as well. This simply was not feasible without a suitable water and waste supply system.
In the Tremont, water was drawn from a metal storage tank set on top of the roof, the recently-invented steam pump raising the water on high. A simple water carriage system removed the excretal water to the sewerage system. As with other individual buildings of the time, each had its own source of water and removal.
Five years later in New York City, Rogers surpassed his achievements of the Tremont Hotel.
He built the Astor House with six stories, featuring 17 rooms on the upper floors with water closets and bathrooms to serve 300 guest rooms. The Astor and the Tremont were the first modem buildings built with extensive plumbing. (In contrast, the Statler Hotel in Buffalo caused a sensation in 1908 by offering 'A room with a bath for a dollar and a half.')
Rogers the architect was in very good company. His former employer was Solomon Willard, who had developed the first widely-used American system of central heating.
In the 1830s, at least one private house, a James River mansion, had a wood-fired hot air heating system. Heat wafted up to the first floor via handsome brass registers. Ladies of New York City's High Society wasted no time in flocking to the parlor after dinner to stand over its registers for warmth.
Central heating, however, was generally confined to the public rooms and hallways. Guest rooms were still heated during this period by parlor stoves and fireplaces. This lack of heat throughout the home retarded the development of bathrooms.
Our Dirty Forerunners: It was said that no house in Quincy, Mass., had a bathroom before 1820. When the temperature of a bedroom dips below the freezing point, there is no satisfaction in bathing.
Most Colonial bathing consisted of occasional dips in ponds or streams. Typical was a quote from Elizabeth Drinker, the wife of a highly-placed Philadelphia Quaker. She had a shower (probably a bucket arrangement) put up m her backyard for therapeutic use in 1799. She said, 'I bore it better than I expected, not having been wett all over at once, for 28 years past."


Left: A Copper lined closet, with oak high tank and seat.

When bathing did become the rage, it evolved over quack hygiene rather than cleanliness. Then there emerged a blend of latrine and spa just like in Merrie Old England.
In aping the customs of fashionable Britain, one historian commented that dueling probably killed fewer people than the spas springing up in various parts of the country. If the mineral waters tasted or smelled foul enough, people believed they could cure anything that ailed them. In the latter 1770s, Colonials would soak and sip in fashion as their counterparts at Bath or Spa, England, imitating the good society of the Old Country.
Warm Springs, Pa., in 1775 drew people from all over, taking in the waters. Some lived in cabins, all cooking at a common fire. Gentile boarding houses and pumps were built, and dancing rooms added to the pleasantries. The adjacent mosquito-rich swamps were drained, and the church was enlarged to keep pious visitors happy.
A Dr. Benjamin Rush had the bad luck to have a well with horrible-tasting water in his back yard. The whole town flocked to it to cure all kinds of ailments. When the overpumped well went dry, the people learned too late that the well connected to the doctor's privy.
Many thought bathing was a health hazard. In 1835, the Common Council of Philadelphia almost banned wintertime bathing (the ordinance failed by two votes). Ten years later, Boston forbade bathing except on specific medical advice.
Poor water supply contributed to this attitude. The bathtub had to be filled and emptied with a hand pump and pail. It was too onerous a chore.
But by 1845, the installation of sanitary sewers began to pay off with an outlet for waste water, indoor plumbing and working water closets were getting closer to fruition. Unfortunately, bad plumbing and the stench from open sewer connections made some new homes uninhabitable.
Early in the 19th centery, the stack was vented through the roof, but no one knew how to property size the pipe. Usually the size was understated. Many vent pipes were so small they would clog up with frost during the winter. Not long after, a crown vent was added, i.e., the connection was made at the top of the vent.
In 1874, there was a tremendous breakthrough when an unknown plumber solved the problem of venting. He suggested balancing the air pressure in the system with the outside atmospheric pressure to prevent the siphonage or blowout of a water seal in the traps. He installed 1/2" pipe at the traps and extended the pipe outside. It worked for a little while, but then the vent clogged and the stench returned. Through trail and error, the plumbers learned to increase the size of the pipe.
Boring Business: Early settlers knew nothing of lead or iron pipe - they knew only to build with wood, the country's bounty.
Water pipes were made of bored-out logs, preferably felled from hemlock or elm trees. The trees would be cut into seven-to-nine-foot lengths, their trunks around 9-10" thick.
Wooden pipe laid below ground created several problems, however, especially in larger settlements or towns. Uneven ground below the joists would cause sags in the log where water would stagnate, infest with insects, and generally leave a woody taste.
The borers themselves were colorful characters who usually traveled in pairs from town to town bringing news and gossip of the area as they went about their job. With a five-foot steel auger between them, a handle at one end, they would fix the log by eye, size it up with a point of the ax, and drill or bore out the center. Ramming one end to make a conical shape, they would jam the logs together in a series, using a bituminous-like pitch or tar to caulk the joists. Sometimes they would split the log and hollow it out, put it together, connect the logs with iron hoops, or get the blacksmith to caulk the logs with lead.
They would set up a gravity water system, starting from a spring or stream on high ground, allowing water to flow downhill to the house or farm. It would cut a path back of the house, through the barn, and flow into a catch basin.
In 1652, Boston incorporated the country's first waterworks, formed to provide water for firefighting and domestic use. As fire was a common hazard in those days of wood-framed houses and stores, and chimney fires always a risk, it was imperative that a ready supply be on hand.
The line supplying water to Boston's wharves and other buildings ran from Jamaica Pond to the Faneuil Hall area, the meeting place for the Massachusetts rebels who held their Boston Tea Party in the nearby harbor on Dec.16, 1773. Just recently a section of a wooden water main was removed from that same vicinity. The log measured 22 feet long, the bore a 4" I.D. for the lower half of the tree, and 2-1/2" in the upper. Common with early wood pipe, the tree's natural forks branched out in wyes and tees.
In 1795, the Jamaica Pond Aqueduct Corp. followed through with 15 miles more of 3" and 5" wooden water pipe of bored logs, again using hemlock trees for construction. Since open wells provided easy access to contamination from nearby privies, the new supply of fresh water contributed to a lower death rate.
Crude by almost anyone's standards, these new pipelines were nonetheless invaluable to firefighters. They would punch a hole into the wooden pipe along the edge of the street, insert a smaller pipe., presized to fit the newly borred hole and harness the hose of their fire wagon, a two man pumper. The fire out, they would plug up the hole again with a pre-cut conical stopper on the end of a long pole, insert it into the hole, and bang it shut. This was the " fireplug, " the wooden pole left sticking out of the ground marking the plug, ready to be pulled out for the next chimney fire.
Wooden pipes were common until the early 1800s when the increased pressure required to pump water into rapidly expanding streets began to split the pipes A change was made to iron.
Waterworks Come Of Age: In 81804, Philadelphia earned the distinction as the first city in the world to adopt cast iron pipe for its water mains. It was also the first city in America to build large scale waterworks as it drew upon the ample supply of the Schuykill River. A friendly neighbor, Philadelphia sold its cast- off wooden pipe to Burlington, N.J., where it remained in use until 1887, when larger mains were required.
Those were the days when the science of medicine in its infancy, and misguided notions of causes of disease ruled the day. Philadelphia was motivated to clean up its city and draw upon a new supply of water in the mistaken belief that yellow fever was caused by the city’s polluted wells rather than the bite of the mosquito. Yellow fever hit Philadelphia in 1793 with an impact like the Great Plagues of London.
Efficient waterworks depends on pumps. Prior to steam power in the 1800s, water wheels harnessed river flow to raise the water. On the frontier and on farms, windmills and simple hydraulic pumps provided the most efficient means of pumping water for the entire farmyard. A storage tank large enough to hold two or three days' supply of water would be mounted on the upper floor of the barn, water then piped to individual locations
By the latter 1800s, windmills would still be, in full force, their new and better workings keeping the farmers son from the lure of the big city. Who could resist this 1893 sale pitch from Aermotor Company
"Many a farmer’s boy has been content to remain home through the great assistance rendered him by the Geared Aermotor. This tireless worker not only pumps water, but turns the grindstone, saws the wood, shells corn, chums, and a dozen other things that are most disagreeable to the boy, and that would tend to discourage him and make him discontented."
But metropolitan cities require more than windmills or simple hydraulic pumps to generate a water supply for an entire population, especially for those in the throes of the Industrial Revolution. The population of Chicago, for example, soared from 350 people in 1835 to over 60,000by mid-century. In 1869, the city unveiled a new engineering feat that made newspaper headlines around the world.
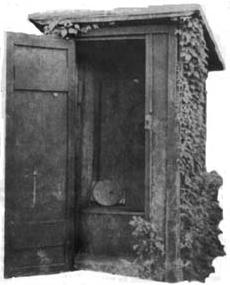
Left: An early 20th century outhouse with a fanciful design.

The Chicago Waterpower supplied the city with water via a twin-tunnel system which extended two miles out into Lake Michigan. Offshore, the clear take water entered an underwater shaft leading to the tunnel below the lake bed, the intake shaft protected by a wooden crib.
The first tunnel, completed in 1869, completed in 1869, contained a massive three foot-wide, 138, foot-tall standpipe which equalized pressure in the mains throughout the city’s water system. The building was miraculously spared in the Great Chicago Fire of 1871, and still stands as a monument to the city’s past.
Coal-fired, steam-driven engines drew water from the tunnel beneath the lake. They provided 15 million gallons per day into the city's water mains. When the pumping station was modernized in 1906 and new engines installed, the standpipe was removed. The station today contains six powerful engines which pump 72.5 million gallons on an average day.
Sewers, PLEASE: Although Chicago is credited with having the first comprehensive sewerage project in the country (designed by E. S. Chesbrough in 1885), the already teeming city of New York provided the general model for the development of water supply and sewage disposal systems across the country.
Water was always at a premium in Manhattan, from day one of its purchase from the Indians in 1626. A bucket of water had to be hand-drawn and carried from springs or wells. Those too far away relied on peddlers who made rounds selling water by the bucket, off water carts or barrels. Later, water would be rationed at street pumps or hydrants which would operate frequently during the day.
Waste and garbage thrown onto the streets created abominable conditions, though people were merely following centuries old customs. hey were compounded by privy stations set against buildings whose "cleanup" presented even more problems. As early as 1700, concerned officials passed an ordinance prohibiting scavengers from dumping "tubs of filth" in the streets.
But driving wells and digging cisterns to collect water were still the primary means of procuring water throughout most settlements. However, water was not a popular beverage during those early days. A little girl from Barbados boarding with her grandmother in 1714 while the eight-year-old attended school in Boston, complained to her father that grandmother was making her drink water. Dad wrote back and insisted that she get beer or wine as befitting her station.
This distaste for water probably harkened back to the medieval notion that water caused the chills, plague and all sorts of ailments. The more likely reason was that the privy and the local well were too close together and spawned cholera and typhoid instead of good taste and purity.
In the early 1700s, New York, as did Boston, had constructed a wooden pipe system under the roads, and sold water at street pumps or hydrants. It would take New York another 25 years to lay underground sewers for storm water as well.
Another 50 years passed before New York constructed a truly viable public waterworks system. In this plan, well water was pumped to an above-ground reservoir and distributed via water mains of cast iron. The main carried the water to fire hydrants along the narrow streets. But five years later, the system broke down in the chaos of the great New York fire of 1835, which destroyed 530 buildings. The water supply could not cope with the demand of the firefighters.
In response to the needs of its firefighters and to provide potable water for the already teeming population, the city revamped its designs and developed a more sound, pressurized system.
Completed in 1842, the Croton Aqueduct System transported water from a huge reservoir in Croton, 40 miles north of the city, to a secondary reservoir on 42nd Street, and to another in Central Park. They fed into a network of underground mains. Now it was possible to supply buildings with running water. However, except for a simple water carriage operation, there was no provision for waste water.
Engineer Julius W. Adams provided the framework upon which modem sewerage is based. In 1857, Adams was commissioned to sewer the city of Brooklyn, which then covered 20 square miles. There was no data available in proportioning sewers for the needs of the people. Yet, working from scratch, Adams developed guidelines and designs that made modem sanitary engineering possible. More importantly, he published the results. By the end of the century, how to textbooks would be available for towns and cities to use all across the country.
The pieces to the puzzle of good plumbing had finally come together proper venting, waterworks and sewers brought the closet indoors to stay. American potters duplicated the successes of their English predecessors, and then some. Finally, the mass production line brought down the cost of production of fixtures, fittings and valves, making them affordable and available from the rich on down. With the final correlation between disease and water borne bacteria the impetus to plumbing was complete.
The Closet Evolves: The development of the water closet in the United States parallels the experience of England where the modern closet was invented. But until the development of a one piece toilet with no metal parts, the closet would continue to be a source a contamination and a health hazard.
Like in England, the conical-shaped hopper was invented first. It set into a lead trap that was placed under the floor. Flushed by a valve directly connected to the bowl, it readily became a source of contamination.
Next came the pan closet, consisting of an upper earthenware basin and a shallow copper pan containing 3-5" of water as a seal at its base. It could be tipped to discharge the contents into a lower, large cast-iron receptacle connected to the drainage system. The metal pan operated on hinges, activated by a lever.
The washdown closet followed the principle of pan closets. The water was flushed by a direct line from a storage tank in the attic. Pull the handle in the closet, and it opened a valve at the top of the chamber. It was connected by a copper wire. The water flowed until the handle was released. It scored a complete flush as the water struck against a piece of sheet lead inside the bowl and caused a spray in all directions.
Unlike earlier models, a short hopper closet followed that was set on a tray, and the trap was placed above the floor. Originally made of stoneware, it was practically impervious. But later on, fireclay closets would be passed off to unwary customers.
The first American patent for a plunger closet is attributed to William Campbell and James T. Henry in 1857. It resembled the twin-basin water closets deplored by the great English engineer, S.S. Hellyer. The mechanism was unsanitary, as was the trapless closet of George Jennings.
John Randall Mann, and American, developed a siphonic closet in 1870. Three pipes delivered water into the basin; one fed the flushing rim around the basin’s edge, one discharged about a half gallon rapidly into the basin and started the siphonic action, and the third provided the after flush.
William Smith developed a jet siphon closet in 1876. It was carried still further by the famous American sanitary engineer Col. George E. Waring, Jr., into larger and more complicated pieces of sanitaryware.
Thomas Kennedy, another American, patented a siphonic closet which required only two delivery pipes, one to flush the rim, the other to start the siphon. William Howell improved it in 1890, when he eliminated the lower trap without detriment to the action.
Ten years later, Robert Frame and Charles Neff of Newport R.I., produced the prototype of America’s siphonic washdown closet, although it sometimes failed to develop the necessary action and the contents overflowed. Another decade passed before a redesigned bowl by Fred Adee would spur the production of the siphonic closet in America.
In the early 19th century, U.S. production of the closet was inferior to the English, and most closets were imported. By 1873, 43 British firms, including Twyford, Doulton, and Shanks were exporting high-quality closets to the U.S.


Left: A luxury bathroom of the 1890s would feature wood-encased fixtures in Victorian spendor.

By century’s end, U.S. manufacturers caught up with the Europeans, and American products began to swamp this market. The American sanitary industry was said to have been born when pottery maker and decorator Thomas Maddock teamed up with his friend William Leigh. The timing was none to soon, because importing English materials was a very costly endeavor.
It was tough to convince fellow Americans to buy American products, however, so Maddock carefully stamped each closet with a lion and a unicorn, and the following inscription: "Best Stafford Earthenware made for the American market."
Harington had suggested a basin of brick, stone or lead dressed with pitch, resin or wax. Since then, stoneware, earthenware, fireclay and vitreous enameled porcelain led the way. Salt glazing was an early breakthrough; the process covered the materials with an impervious glaze which offered new resistance to stain and liquid.
Decorations were confined first to the bowl’s interior because the wooden surround precluded any outside design-no one would see it. When the washout and the washdown models were now exposed in their entirety, the water closet became not only a functional product but an artistic one as well. The outside bowl could be embossed or colored for esthetic choice.
Pedestal models proved most popular, highlighted with elaborate patterns and fanciful names. Popular examples were the English Lion and the Dolphin models. The Dolphin curled up into letter S, the bowl in the shape of a fluted shell. (Carvings of dolphins had separated the seats used by the Roman soldiers in the privy at Timgad, an ancient Roman city in what is now Algeria.) A Dolphin water closet of Edward Johns & Co. won a Golden Award for design at the Great Philadelphia Exhibition in 1876. (The company today, Armitage Shanks, has reproduced the original “Dolphin Suite,” complete with mahogany toilet seat, vanity doors and polished brass taps and fittings.)
Underglaze patterns became popular, too, as well as hand-painted patterns of birds, flowers and fruit. Usually applied after the glazing, particularly with fireclay and similar materials, these underglaze decorations were less permanent. Gilding was the most expensive decoration: a specially-prepared gold, ground down with alloys and flux, compounded with turpentine and oil base, was applied by brush on an already embossed pattern.
Without extensive piping and adequate sewer and supply systems, however, the “modern” water closet would have gone the way of Harington’s old relics. Early American plumbers, unschooled in the impressive engineering feats of their old Roman forerunners, would have to learn on their own how to build and construct comparable supply and waste systems. The method was still trial-and-error.
Bathrooms Come Of Age: For the well-to-do, an unused bedroom converted into the novel bathroom. The practice probably foreshadowed the trend of present-day "empty-nesters" to make unused bedrooms into fitness and relaxation centers. By the mid-1850s, however, finer new homes were being designed with separate bathrooms.
Benjamin Franklin is said to have imported the first bathtub to America. Brought over from France in the 18th century, this early creation was made of sheet copper shaped like a shoe, and hand-filled by bucket. A more common model would be in the shape of a mummy's tomb, all wood and six feet long.
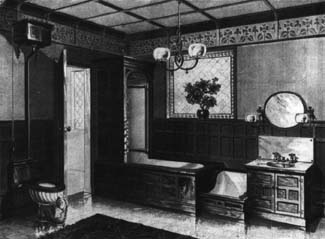
Left: An earth closet used indoors used fresh earth or ashes on the bottom of the wood structure to absorb ordors.

The popularity of tub-bathing grew as the country flourished and expanded. For example, only 200 people resided in Tucson, Ariz., in 1865. By 1871, however, the town would boast 3,000 people, a newspaper, a brewery, two doctors, several saloons and one bathtub.
But the country's first bathtub with fittings-was commissioned by a Mr. Thompson of Cincinnati, Ohio, in 1842. He envied the invention of Britain’s Lord John Russell and had the same tub duplicated for himself. The tub was encased in mahogany and lined with sheet lead. It measured 7'x 4', and weighed nearly one ton.
The fittings connected to two pipes running from the attic tank. One pipe carried cold water, the other was a hot water pipe that coiled down the chimney. The water heated as it passed through the coil.
Grander bathtubs a century later were encased in paneled or embossed wood. Big, brass fixtures were bold and showy in Victorian splendor. George Vanderbilt's bathroom of 1855 boasted a porcelain tub, and featured exposed pipe for all to see, the fittings reduced to a neat arrangement. Those with money tried to emulate Queen Victoria's bathroom where, it was said, the controls looked like those for a battleship.
The old Saturday night bath in front of the kitchen fire or potbellied stove was of tin or copper. Lead "gave way" to cast iron, which in turn was the forerunner of the modern enameled iron tub. Now we can add porcelain enameled iron and steel and acrylic, too.
By the turn of the century, a luxury bathroom would be a grand-sized room, outfitted with a 5-foot enameled tub, shower bath and receptor, sitz bath, foot bath, pedestal lavatory and siphon jet closet. Including all the fittings, trim and traps, the cost would come to $542.50. (Heavy tasseled drapes and stained glass windows were extra, of course. Although patterned wallpaper would yield to tile on the walls and the floor, the big area carpet would remain.)
When Johnny came marching home after the wars, builders could not keep up with the demand for housing. A land shortage in the throes of urban development sparked cubbyhole apartments and smaller homes than before. Tract housing would be one answer; downsizing the bathroom in sacrifice for more space was another tradeoff. Pedestal lavs disappeared as vanities with storage cabinets below topped the trend. Today, the reverse is true - bathrooms are bigger, the fixtures more imposing than ever. And at least two bathrooms are a must in most new houses.
Today, there are tubs for two and oversized tubs with accompanying oversized faucets, and lavs constructed from all materials including marble and precious stone. Where chrome and nickel plated faucets stood, luxury materials such as gold, malachite, tiger's eye, onyx and polished granite would take their place. In such a setting, King Midas might well turn green with envy.
The growth of plumbing in America was phenomenal. In one 25-year period, from 1929 to 1954, sales by distributors of plumbing products and heating equipment rose from $498 million to $2.33 billion, a whopping 367% increase.
And manufacturers would cater to the increased demand with myriad choices of materials, colors and styles. Forerunners of great plumbing companies today would make their first appearances in the 1890s: Crane Co., National Tube Works (U.S. Steel), Ahrens & Ott and American Radiator (predecessor companies of American-Standard), and the Kohler Company, to name just a few. The single-handle mixing faucets so commonplace today are actually less than 50 years old. Al Moen is credited with the design for a double-valve faucet with a cam to control the two valves that he made in 1937. He refined the design into a cylinder with a piston action. Continued refinement has led to the replaceable cartridge, push-button diverter, back-to-back installation, swivel spray and pressure balancing valve.
Stainless steel is also a relative newcomer to the surging market of plumbing materials, perhaps exemplified by the growth of Elkay Mfg. Originally incorporated to manufacture pantry sinks of German silver and polished copper, Elkay added a line of d steel scullery sinks in 1921. By the 1950s, the company was spurring lines of sinks and faucets in stainless steel that would become mainstays of the plumbing industry.
Flexible water supplies are fairly recent developments as well. They were pioneered by Robert M. Zell the founder of Brass-Craft Mfg., back in 1939.
But today's manufacturers are not content to rest on past successes, as research and development produce better pipes, valves, fittings and fixtures. In the 19th century, plumbers used plain or tin lined lead piping for cold-water service, but they also had a choice of tin-lined, galvanized, enameled or rubber-coated wrought iron piping. Copper tubing was added after World War 1, and now plastic under certain conditions.

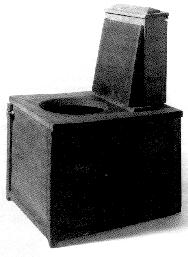
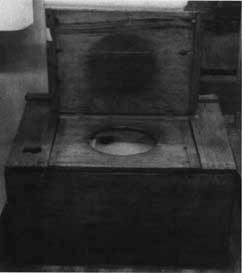
Left: This wooden box encloses a square water closet from early American days.

It seems that the wonders of the Ancient World and the Old Roman Empire have come full circle. Presently under construction is a grand hotel complex in Scottsdale, Arizona. It is patterned after the Hanging Gardens of Babylon. There will be 10 pools, 28 fountains, 47 waterfalls, a man-made sand beach and a Roman-style aqueduct. Under the watchful eye of the old Hohokam spirits, about 28 basic plumbing systems will be used to make this feat possible.
Of Codes And Men: It was only after the Civil War that the germ theory of disease was proven true, that contagion could be traced to contaminated water supply and unsanitary waste disposal. With waves of cholera, typhus and typhoid fever sweeping the country, the people turned to the resources of government to investigate the causes.
The English Pubic Health Code of 1848 became a model plumbing code for the world to follow. Twenty years later, the New York Metropolitan Board of Health was formed, the first such health board in the United States. Two years later, its Metropolitan Health Law was considered the most complete health legislation in the world. The nature of ground water was studied, as were drainage, sewage, water supply, waste disposal and location and characteristics of water closets. The plumber, long vilified in early years, saw his status upgraded to that of the Sanitarians
The idea of sanitary plumbing systems within buildings was an American development that soon spread throughout Europe. Over the next two decades and more, plumbing health codes expanded coverage to encompass examination, and licensing.
Trade associations were formed, spearheading plumbing ordinances and laws for regulations and examination. Master plumbers, while they had developed methods of trapping and venting to guard against contamination, had no real knowledge of hydraulic principles. So they installed systems they didn’t understand or know how to design. Standards had to be proposed, and lessons in business management learned.
Appropriately, the National Association of PHCC (formerly the National Association of Master Plumbers), first met in committee in 1883 at the old Astor House, the hotel that provided the impetus to modern plumbing back in 1834. Many new plumbing inventions had appeared and too many plumbers were ill-prepared. Close on their heels would be the Mechanical Contractors Association of America, the American Society of Heating, Refrigerating and Air Conditioning Engineers, and the American Society of Sanitary Engineering.
Wholesalers banded together, too starting programs to prod manufacturers into standardizing such things as sink and basin outlets, faucet drilling, trap gauges, etc. The Central Supply Association, for example, was formed in 1894 and soon made contacts with the old Eastern Supply Association, the Plumbers Association of New England and the National Association of Master Plumbers. But it would take another 30 years to accomplish the standardization on which everybody takes for granted today.
An outbreak of amoebic dysentery in Chicago during the 1933 World's Fair was traced to faulty plumbing in two hotels. Tragic results were 98 deaths and 1,409 official cases. One year later, Major Joel Connolly, Chief Inspector of the Chicago Bureau of Sanitary Engineering, spoke these prophetic words:
"One of the lessons to be drawn from the amoebic dysentery outbreak ... is that plumbing demands the very best, painstaking effort that thoroughly qualified, certified plumbers can give in every building, and especially where the systems are complicated and extensive, and where large numbers of people may be affected by contamination of water."


Friday, April 22, 2011

How to Repair a leaking faucet

repairing leaky faucets by faucet type
New faucets may have the hot & cold water flow controlled by a single handle or lever. Repairs for four types of single-handle faucets are described here.

Before you start
1)
Turn off the water supply. Look for a shutoff valve under the sink. If there is not one for the fixture, turn off the water at the main shutoff valve. It may be located near the water meter, in the basement or crawl space.
2) Have on hand an assortment of replacement parts, like washers & o-rings.
3) Close or block off the sink drain, so that small parts aren't lost if dropped.
4) Protect the sink basin against chipping from tools by lining it w/ a towel.
5) When working on the faucet, don't try to force parts that are corroded or won't move. Apply a few drops of penetrating oil to the parts, wait a while & try again.
6) As you work, remember to line up the parts in order as you take the faucet apart. This will help you reassemble it correctly. Tools & materials you will need include: adjustable wrench, channel lock smooth-jawed pliers, screwdrivers, washer assortment, penetrating oil, & packing.
disc faucet
A disc faucet has two discs to mix the hot & cold water & control the amount of flow. The disc assembly itself will rarely need replacing. Leaking usually means that the inlet seals are worn & should be replaced. Replacement kits are available at plumbing supply firms. To get the right kit, write down the brand of faucet you have, or take the disc along w/ you.
1) First, turn off the water supply & drain the water by lifting the lever to its highest position.
2) Under the lever is a set screw that holds the lever to the lever post. Use a screwdriver to turn the set screw counterclockwise until you can lift off the lever.
3) Lift off or unscrew the cap that covers the cartridge. Loosen the screws on top of the cartridge & lift it out of the faucet.
4) At the bottom of the cartridge is the set of seals. Pull out the worn seals & replace w/ new ones from the kit. Remove any mineral sediment that has built up in this area.
5) When reinserting the cartridge, align the holes w/ those in the base of the faucet body. Reassemble the faucet reversing the order it was taken apart.

sleeve cartridge faucet
When you raise the handle of this faucet, the stem also raises, controlling the flow of water. Rotating the handle to the right or left controls the water temperature. Leaks usually mean replacing the o-rings or the entire cartridge. Take the old cartridge w/ you to a plumbing supply store to ensure that you get the correct replacement part.
1) First, turn off the water supply & lift the handle to drain the water.
2) Carefully pry off the decorative handle cover or housing & remove the handle screw.
3) Lift off the handle assembly. On some faucets you may see a "keeper" or retainer clip at the base of the handle assembly. w/ others, like a swivel-spout faucet, you must first remove the handle & then the spout. If this is the case, unscrew the retainer nut, then lift off the spout.
4) Under the handle, you may find a tube or cylindrical sleeve that slides off to expose the "keeper" or retainer clip. This clip is what holds the cartridge in place. Use long-nose pliers or a screwdriver to remove the clip from its slot.
5) Lift the cartridge out of the faucet body w/ pliers. If the 0 rings are worn, install new ones.
6) If the cartridge is to be replaced, note the position of the cartridge ears, or a flat spot, arrow, or marking on the cartridge stem. When the cartridge is replaced, they should be in exactly the same position as when removed.
7) Replace the cartridge & the retainer clip. On swivel-spout faucets, lubricate the 0 rings around the outside of the body & then push the spout down over the rings, into position.
8) Tighten the retaining nut w/ taped or cloth-covered pliers & reinstall the handle.

rotating ball faucet
The single handle sits on a ball assembly. When the faucet is raised, this ball rotates to control the flow of water. Moving the handle to the left or right allows hot or cold water into the mixing chamber. Leaks from the spout can occur when the seals & springs give out.
Leaks at the handle may mean that the adjusting ring is loose or that the seal above the ball is worn.
Leaks under the spout may require replacing the o-rings. While the faucet is apart, check for a worn or corroded ball & replace if necessary. Repair kits are available at plumbing supply stores. You'll need the make & model number or the old parts to get the correct replacement kit.
1) First, turn off the water supply & lift straight up on the handle to drain the water.
2) Loosen, but don't remove, the handle's set screw w/ an allen wrench & remove the handle.
3) Loosen the adjusting ring. A special wrench for this comes w/ most repair kits. Unscrew the cap, using cloth or tape- covered adjustable pliers if needed.
4) Lift out the cam assembly & ball. If you have a swivel-spout faucet, lift off the spout as well. You may have to carefully pry the spout loose at the base or exert some pressure to lift it off, since it is friction-fitted around the body.
5) Remove worn seals & springs from the body w/ long-nose pliers or a pencil inserted into each seat. Scrape away any mineral deposits & replace the new springs & seals.
6) If yours is a swivel-spout faucet, pry away the o-rings from the body, & roll the new ones down until they're in the appropriate grooves. If the faucet has a spray diverter, replace the diverter o-ring in the same way.
7) Reassemble the parts in reverse order from which they were taken out. When you replace the ball, align the slot in its side w/ the pin inside the faucet body. The key on the cam assembly also fits into a matching notch on the faucet body.
8) w/ a swivel-spout faucet, push the spout straight down until it clicks against a slip ring at the base of the body. The tension from the o-rings may mean that you'll have to push hard.
9) Hand-tighten the cap & tighten the adjusting ring to get a good seal between the cam & the ball. If you notice a leak around the handle after testing the faucet, tighten the adjusting ring a bit more.
 
repairing a stem or two-control faucet
Stem faucets can be identified by their separate controls for hot & cold water. Leaks in these faucets can occur in the spout, the stem or at the base. Although these leaks are annoying & waste water, they are one type of plumbing problem that's usually easy to repair.

Before you start
1)
Turn off the water supply. Look for a shutoff valve under the sink. If there is not one for the fixture, turn off the water at the main shutoff valve. It may be located near the water meter, or in the basement or crawl space.
2) Have on hand an assortment of replacement parts, like washers, washer screws, o-rings & packing.
3) Close or block off the sink drain, so that small parts aren't lost if dropped.
4) Protect the sink basin against chipping from tools by lining it w/ a towel.
5) When working on the faucet, don't try to force parts that are corroded or won't move. Apply a few drops of penetrating oil to the parts, wait a while & try again.
6) When you start, remember to line up the parts in order as you take the faucet apart. This will help you reassemble it correctly. Tools & materials you will need include: adjustable wrench, channel lock smooth-jawed pliers, screwdrivers, washer assortment, penetrating oil, & packing.
to make faucet repairs
A stem faucet can either be a compression (threaded stem) or washerless type. The washerless type uses a cartridge or diaphragm & discs instead of the washers & valve seats found in the compression faucet.
The faucet must be taken apart to determine its type. Follow steps 1 through 4 below. Then examine the bottom of the piece removed from the faucet. If there is a washer, held in place by a washer screw, continue w/ step 5.
If there is no washer, it is either a Cartridge or diaphragm faucet. Take the entire cartridge or diaphragm stem assembly to a plumbing supply dealer & get the correct repair kit. Follow the manufacturer's directions for replacement & repair.

compression faucet
If the faucet spout leaks or drips, either the seat washer or the seat itself needs attention.
1) Turn off the water supply & turn faucet handles on to drain water from the faucet.
2) Remove the handle screws (which may be under a decorative button) using a Phillips head or standard blade screwdriver. The handle lifts straight up or out & off.
3) Use adhesive or friction tape around the packing nut to protect it. Remove the packing nut w/ a crescent wrench or pliers.
4) Slip the handle back on the stem & turn the handle to loosen the stem. If the stem doesn't back out when you turn the handle, use your fingers, pliers or adjustable wrench.
5) Remove the screw at the bottom of the stem. Use penetrating oil, if needed. Remove the old washer & replace w/ a new one of the same size & shape. While the faucet stem is out, you may wish to check the packing, o-ring or packing washer for replacement. Leaks around faucets handles or at the base of the faucet may occur when these parts are worn.
6) Older faucets may use packing, usually a string like material that serves as a washer between the stem & the cap. Remove the old packing & wind new packing string clockwise around the stem to form the seal. If the older faucet uses self-forming packing, a ready-made packing washer that fits may be used as a replacement. Push the packing washer onto the stem as far as it will go & screw the nut over it, clockwise.
7) If the faucet is a newer model, replace the packing washer or o- ring.
8) If the stem or screw is corroded, buff lightly w/ fine steel wool. Clean off all dirt & steel wool residue.
9) Reassemble the faucet. When you tighten the assembly w/ wrench or pliers, don't use too much pressure. That can strip the threads & cause the faucet to leak.

still leaking?
If replacing the washer &/or packing doesn't stop the leak, the valve seat at the base of the faucet body may need replacing or grinding smooth. Take the faucet apart.
1) Remove the worn valve seat w/ an allen wrench or seat wrench, & take it w/ you to a plumbing supply store to get an exact replacement.
2) If you can't remove the valve seat, purchase an inexpensive seat cutter or grinding tool. Insert the grinding tool & adjust the guide nut to the depth of the opening of the faucet housing. Now turn the grinding tool clockwise a few time w/ its handle or pliers. Use light to moderate pressure, since it doesn't take much grinding to smooth the valve seat. Clean out residue & reassemble the faucet.

CAUTION:
The first rule of any plumbing repair is to turn off the water supply.
Soldering involves use of an open flame that may not be visible when properly adjusted. Protect flammable surfaces from fire w/ sheet metal, a heatproof pad or wet rags. Keep a fire extinguisher or bucket of water w/ a thick towel soaking in it handy to extinguish accidental fires when soldering. Flux & solder can bubble, split & spatter.
Protect your eyes w/ safety glasses. Wear leather work gloves to protect your hands.
Flux & solder fumes are toxic. Provide plenty of ventilation.
Wear an appropriately rated dust mask or respirator whenever airborne particles or chemical fumes are present.

Thursday, April 21, 2011

How to Fix a Mixing Valve

A mixing valve is a key component in a faucet or shower; it combines hot and cold water to maintain steady water temperatures. A mixing valve, also called a mixer valve or diverter valve, needs repair or replacement if the faucet handle is hard to move, drips or provides only hot or cold water. Repair or replacement is an easy do-it-yourself project for a homeowner and does not require a plumber.

Instructions

    • 1
      Turn the main water supply valve in a counterclockwise direction to turn off the water to the faucet, found under the sink or in the basement.
    • 2
      Turn on the faulty shower or faucet to allow the water to drain from the water supply pipes.
    • 3
      Remove the ornamental faucet handle by lifting it off gently with a screwdriver. Many ornamental coverings are made of plastic and do crack or break if you are not careful.
    • 4
      Remove the exposed screw with a screwdriver and lift off the faucet handles on each side.
    • 5
      Locate the nut at the top of the stem and use an adjustable wrench to loosen and remove it from each faucet handle.
    • 6
      Lift the stem out of the faucet to see the mixing valve located directly under the stem.
    • 7
      Take the retainer clip off the mixing valve with a needle-nose pliers by lifting the retainer clip straight up. Find the retainer clip on top of the mixing valve.
    • 8
      Inspect the washers, rings and metal parts for cracks, chips, breaks and signs of wear. Remove damaged parts and replace them. Match parts for replacement at plumbing supply stores or order from the manufacturer.
    • 9
      Wipe the mixing valve with a rag to remove dirt, grime and debris.
    • 10
      Apply a light coat of petroleum jelly on all sides of the rings to lubricate them and allow smooth movement.
    • 11
      Place the mixing valve back into the faucet, reattach the retainer clip, put the faucet stem back in place, tighten the nut, press the handle back in place and turn on the main water supply.

Wednesday, April 20, 2011

Hot Water Heater Problems That You Can Fix

  • Hot Water Heater Problems That You Can Fix 
  • Hard water contaminants can build up over time: This can create a layer of sediment on the bottom of the water tank. This hinders the heater’s performance and shortens its life. Slow down this process by softening the hard water and lowering the temperature to 130 degrees.
  • Not enough water: Push the reset button on the high-temperature cutoff. Test the thermostats and replace them, if they are not working. Test the heating element. Replace it if it is faulty.
  • Not enough hot water: Adjust the thermostat settings. Reset and then test the replaced thermostats or heating elements.
  • Water is too hot: Adjust the thermostat settings and reset. Test and replace the thermostat or high-limit cutoff.
  • Leaky heater: Check the pressure relief valve. If leak continues, replace the valve. Tighten the mounting bolts on the heating element gasket. Replace gasket, if needed.
  • Rusty tank: Replace the water heater.
  • Noisy heater: Drain and flush the tank. Replace damaged or scale-encrusted elements.

Common gas hot water heater problems and repairs:

Warning: If you smell a gas odor for more than a couple of minutes, close the gas-shutoff valve that supplies water to the heater. Open a door or window to ventilate the room. Call the plumber immediately.
  • Not large enough: If your water heater holds less than 15 gallons of water per family member, you should consider purchasing a larger unit or staggering the use of the hot water within the family.
  • No hot water: Check to see if pilot light is out. Relight it if it is.
  • Pilot light won’t stay lit: Clean the pilot orifice, tighten the thermocouple connections and/or replace a faulty thermocouple.
  • Not enough hot water: Check and reset the temperature controls.
  • Water is too hot: Check and reset temperature control. If too high, have the thermostat professionally serviced.
  • Water leaks: Operate the pressure relief valve. If leak continues and the temperature is okay, replace the valve.
  • Rusty tank: Replace the water heater.
  • Noisy heater: Drain and flush the tank and refill.
  • Dirty hot water: Drain and flush the tank and refill.
  • Relief valve or drain valve leaks: Replace if needed.

Monday, April 18, 2011

Leaky Toilet: Water Under Tank


Leaky Toilet: Water Under Tank

Tighten nuts under tank
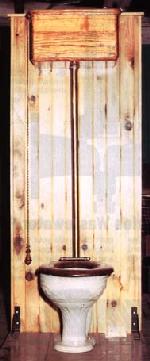
One source of a leaky toilet is loose nuts where the tank is attached to the bowl. To tighten the nuts in the tank use a flathead screwdriver to steady the bolt inside the bowl while using an adjustable wrench to tighten the nut on the underside of the tank.
If water still leaks from around the nuts you will need to replace the washers. Simply hold the bolt steady with a flathead screwdriver while removing the nuts with an adjustable wrench. Be certain to get the proper size washer for the bolt.
Crack in tank
If there is a crack in the tank it will need to be replaced.
Water is leaking through the handle
Reposition the float ball
If the float ball is too high it will allow water to run into the overflow pipe and out of the handle. You can simply bend the float arm down slightly to keep the water about 1 inch below the top of the overflow pipe. Flush the toilet to a make sure it enough water is getting into the bowl. If the toilet does not flush completely you may need to adjust the float ball back up slightly to get more water in the tank.
Adjust a water-intake assembly
Your toilet may have a water-intake assembly instead of a float ball. To adjust the water level in the bowl so it does not flow into the overflow pipe, pinch the clip attached to the thin metal rod and slide it and the cup down to lower the water level. Sliding the clip and cup up will raise the water level. Try moving the clip about an inch at a time.
Adjusting a metered fill valve
Your toilet may have a metered fill valve instead of a float ball or water-intake assembly. To adjust the water level, simply take a screwdriver and turn the knob counterclockwise and half a turn at a time to lower the water level. Turning the know clockwise will raise the water level.
Shorten overflow pipe
If the overflow pipe is too long you can use a hacksaw to shorten it. The pipe should be 1/2 inch below the handle.
Water is leaking around the flush valve
If the flush-valve assembly is damaged you will need to replace it. You might first try replacing the gasket over the locknut on the assembly and then the assembly itself.
You will need to remove the tank to do this. Be certain to turn off the water supply and flush the tank to drain it. You might also want to place newspaper and towels on the floor to soak up any water that may leak out. Using and adjustable wrench loosen the nuts at the supply tube and push the tube aside. Next, use a flat-head screwdriver to hold the bolts inside the tank still while using an adjustable wrench to loosen the nut on the bottom of the tank. You will then be able to lift the tank off of the bowl. Lay the tank on the newspapers or towels.
To replace the flush-valve assembly first remove the old one by unscrewing the locknut on the bottom of the tank. Use a hacksaw to cut the new overflow pipe to 1/2 ince below the tank top. Put plumber's putty on the washer at the base of the flush-valve assembly and push the assembly against the tank opening, removing any excess putty. Use a monkey wrench to tighten the locknut. Replace the gasket over the locknut and replace the tank on the bowl and reassemble them.
Water is spraying from the ball cock
The ball cock opens and closes as the float ball falls and rises with the water level in the tank. This action controls the flow of water into the tank. With a plunger-style ball cock the float arm pushes the valve plunger and washer to stop the water flow. With a diagphragm-style ball cock the plunger pushes against a rubber diaphragm.
Before working on the ball cock turn of the water and flush the toilet to empty the bowl. Remove the screws surrounding the ball cock assembly to gain access to the washers or diaphragm. You may need to slide the float arm out of the way to gain access to the assembly.
Remove the washers or diaphragm from the valve plunger with a small screwdriver. Use vinegar and a small brush to clean sediment from inside the ball cock and washer or diaphragm. Once cleaned reassemble the parts and the ball cock. If any of the pieces appears damaged or if the water continues to spray, replace the ball cock.
Condensation is forming on the tank
In hot conditions condensation may form on the tank. You can purchase an insulation kit at your hardware or plumbing supply store. Before installing the insulation on the bottom of the tank you will need to turn off the water supply, flush the toilet to drain the tank and use a sponge to soak up any water remaining in the tank. Install the foam insulation according to the instructions.
Water is spraying from the refill tube
If water is spraying from the flexible refill tube simply purchase a replacement of the same diameter, cut to proper length and replace the old tube.
Water is leaking from the shutoff valve
If water is leaking from around the shutoff valve you can use an adjustable wrench to tighten the coupling nut.

Friday, April 15, 2011

Toilet Bowl Drains Slowly

The bowl or drain is clogged or blocked
Plunger
First, prepare the floor around the toilet should water overflow or splash out. If the bowl is overflowing or filled to the rim you will need to bail it out. Use rubber gloves, a bucket and a small container to empty about half of the water from the bowl.
If the bowl is empty fill it to half full with water.
Place a plunger flush over the drain opening in the bottom of the toilet. Quickly pump the plunger about a dozen times, then remove it with a quick motion. If the blockage is dislodged the water should rush away. If not, repeat the process as necessary.
Auger
If a plunger does not clear the toilet an auger will likely do the trick. Be careful not to scratch the porcelain in the bowl when inserting the coil into the drain. Once the auger is fed into the drain turn it clockwise until you feel resistance. Then turn it counterclockwise. Repeat this process to clear the clog, then remove the auger from the drain. If the drain is not fully cleared try using the plunger again and then repeat with the auger if necessary.
Remove the toilet
If you are still not able to clear the toilet you may need to remove the toilet to remove the blockage from below.
Float ball is too low or adjust water-intake assembly
Reposition the Float Ball
If the float ball is too low the toilet may not flush completely and you may need to adjust the float ball back up slightly to get more water in the tank. You can simply bend the float arm up slightly to keep the water about 1 inch below the top of the overflow pipe. Flush the toilet to a make sure it enough water is getting into the bowl.
If it also possible that the float ball is damaged or rubbing against the side of the tank. If it is rubbing the tank, gently bend it toward the center of the tank. If the float ball is damaged, it will not rise enough to close the ball cock. The float ball can be screwed off of the float arm counter clockwise. You may need to use pliers to grasp the float arm. When placing the new float ball on the arm, apply petroleum jelly or plumbers tape to the threads.
Adjust the Water-Intake Assembly
Your toilet may have a water-intake assembly instead of a float ball.
To adjust the water level in the bowl so it does not flow into the overflow pipe, pinch the clip attached to the thin metal rod and slide it and the cup down to lower the water level.
If the water level in the tank is too low sliding the water-intake assembly clip and cup up will raise the water level.
Try moving the clip about an inch at a time and flushing the toilet to see the results.
Flush holes are blocked
Clean and clear flush holes
If the flush holes below the bowl rim are blocked the toiled will not drain properly. You can try using toilet bowl cleaner and a brush to clear the holes. If that does not work use a coat hanger to clear the holes and clean the bowl again.

Wednesday, April 13, 2011

Water Runs Non Stop

The handle is stuck
If the tank handle is loose it can be tightened by using an adjustable wrench to turn the locknut on the inside of the tank counterclockwise.
If the nut cannot be turned you might try applying a lubricating oil and allow it to sit for several minutes before attempting to tighten the nut again. If that does not work you may need to remove the nut by cutting through the handle shaft with a hacksaw. You will then need to replace the handle and trip lever, which is attached. Simply remove the trip lever from the chain and slip it through the toilet tank hole before replacing it with a new handle assembly.
Tank water level is too high
Reposition the float ball
If the float ball is too high it will allow water to run into the overflow pipe. You can simply bend the float arm down slightly to keep the water about 1 inch below the top of the overflow pipe. Flush the toilet to a make sure it enough water is getting into the bowl. If the toilet does not flush completely you may need to adjust the float ball back up slightly to get more water in the tank.
If it also possible that the float ball is damaged and allowing water in. If this happens the float ball will not rise enough to close the ball cock. The float ball can be screwed off of the float arm counter clockwise. You may need to use pliers to grasp the float arm. When placing the new float ball on the arm, apply petroleum jelly or plumbers tape to the threads.
Adjust a water-intake assembly
Your toilet may have a water-intake assembly instead of a float ball. To adjust the water level in the bowl so it does not flow into the overflow pipe, pinch the clip attached to the thin metal rod and slide it and the cup down to lower the water level. Sliding the clip and cup up will raise the water level. Try moving the clip about an inch at a time.
Adjusting a metered fill valve
Your toilet may have a metered fill valve instead of a float ball or water-intake assembly. To adjust the water level, simply take a screwdriver and turn the knob counterclockwise and half a turn at a time to lower the water level. Turning the know clockwise will raise the water level.
Lift chain or wire is out of place or damaged
If the lift chain in the tank it too short it may be allowing water to seep through the flapper valve. If there is excess chain you can use pliers to open the links and reposition the chain. If the chain is too short you will need to replace it. Using a paper clip or other other wire to lengthen the chain will cause it to corrode.
If your tank assembly has a lift wire you can loosen the screw attached to the guide arm and move the guide arm up or down to adjust the length.
Ball cock is damaged
The ball cock opens and closes as the float ball falls and rises with the water level in the tank. This action controls the flow of water into the tank. With a plunger-style ball cock the float arm pushes the valve plunger and washer to stop the water flow. With a diagphragm-style ball cock the plunger pushes against a rubber diaphragm.
Before working on the ball cock turn of the water and flush the toilet to empty the bowl. Remove the screws surrounding the ball cock assembly to gain access to the washers or diaphragm. You may need to slide the float arm out of the way to gain access to the assembly.
Remove the washers or diaphragm from the valve plunger with a small screwdriver. Use vinegar and a small brush to clean sediment from inside the ball cock and washer or diaphragm. Once cleaned reassemble the parts and the ball cock. If any of the pieces appears damaged or if the water continues to run, replace the ball cock.
Flapper or flush valve needs servicing
First try cleaning minderal deposits from around the valve seat. This can keep the flapper valve from sealing properly and allow water to seap into the bowl. First turn of the water and flush the toilet to empty the bowl. You can unhook the flapper valve to get it out of the way. Using emery cloth scrub the inside of the valve seat to remove the mineral deposits. Next coat the valve seat with petroleum jelly to help the flapper valve make a tight seal. Replace the flapper valve, turn on the water and check to see if the water still leaks.
If the flapper valve is old it may be deformed. In this case you will need to replace it. You can unhook the valve and remove the lift chain from the valve. Be sure to purchase a similar size replacement valve.
If the valve seat is damaged you will need to replace the entire flush-valve assembly. You will need to remove the tank to do this. Be certain to turn off the water supply and flush the tank to drain it. You might also want to place newspaper and towels on the floor to soak up any water that may leak out. Using and adjustable wrench loosen the nuts at the supply tube and push the tube aside. Next, use a flat-head screwdriver to hold the bolts inside the tank still while using an adjustable wrench to loosen the nut on the bottom of the tank. You will then be able to lift the tank off of the bowl. Lay the tank on the newspapers or towels.
To replace the flush-valve assembly first remove the old one by unscrewing the locknut on the bottom of the tank. Use a hacksaw to cut the new overflow pipe to 1/2 ince below the tank top. Put plumber's putty on the washer at the base of the flush-valve assembly and push the assembly against the tank opening, removing any excess putty. Use a monkey wrench to tighten the locknut. Replace the gasket over the locknut and replace the tank on the bowl and reassemble them.